

How to Prepare Your Wall for a Mural
It's critical to properly prepare your chosen wall before installing your mural to ensure it has a long and healthy life. A brief guide to prepping your wall is below.
Plaster
Make sure your plastered wall is free of contaminants and is clean and dry. Finish with a good-grade sealer/primer.
Painted walls
If your wall is painted, we recommend using only matt emulsion paint for the mural. Remove and sand any old, flaking paint to get a flat surface, then finish with a high-quality primer or wall sealant. Allow 2 to 3 weeks for freshly painted walls to dry before adding your mural.
Walls with wallpaper
Remove any old wallpaper before installing your wall mural, and do not use lining paper behind it. Seal/prime the surface before installation.
Before You Start, You'll Need
- Tape measure, spirit level and a pencil
- A smoothing tool or soft brush
- A broad scraper and a sharp snap-off blade (for trimming the bleed)
- Paste-the-wall murals only: a medium-pile roller and a good-quality “paste the wall” adhesive — paste is not included with your mural
How to Install a “Paste the Wall” Mural
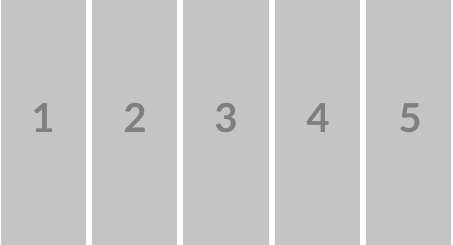
1. Lay Out Your Wall Mural
Your mural is supplied in panels. When you first open it, inspect it well, place the panels in the correct order (numbered left to right) and lay them out flat for at least 5 hours to settle.

2. Draw a Straight Vertical Line
Using a spirit level and tape measure, draw a straight vertical guideline a panel's width in from the edge of the wall. Remember to allow for the bleed.

3. Apply Paste to the Wall
Using a medium-pile roller, apply your paste to the wall where the first panel will go. Apply the first panel to the pasted area and smooth out any excess.

4. Match Up the Panels
Paste the wall before each panel. Place the second and subsequent panels up next to the first, edge to edge, double-checking that the pattern or image matches as you go. Slide each panel into position.
5. Trim the Bleed
Your mural is printed with 2.5 cm of extra image on every edge. Once all the panels are up, hold a broad scraper flush into the ceiling line, skirting and corners and trim the excess away with a sharp snap-off blade. Snap to a fresh blade edge often — a blunt blade tears damp paper; a sharp one leaves a perfect line.
How to Install a “Peel & Stick” Mural
1. Lay Out Your Wall Mural
Your mural is supplied in panels, numbered in the order they are hung, from left to right. Lay them out flat for at least 5 hours, and sponge the wall clean before you begin.
2. Draw a Straight Vertical Guideline
Using a spirit level and tape measure, draw a straight vertical line a panel's width in from the edge of the wall, allowing for the bleed.

3. Peel Off the Backing
Take your first panel and carefully peel a small amount from the top away from the backing paper. Apply the top of the panel to the wall, aligning the right-hand edge with your vertical guideline.

4. Continue Applying the Panels
Apply the second and subsequent panels edge to edge — without overlapping and without leaving gaps — making sure the pattern or image matches at every join.
5. Trim the Bleed
With every panel in place, trim away the 2.5 cm of extra image on each edge: hold a broad scraper flush into the ceiling line, skirting and corners, and cut along it with a sharp snap-off blade. Snap to a fresh edge often for the cleanest line.
Rather not lift a finger? Choose One Piece Wallpaper on any mural — printed as a single seamless piece and installed by our own team.
Ready to Choose Your Wall?
Browse wallpaper murals Measuring guide →
Need Help?
If you have any questions about installing your mural, our team is happy to help at help@featurewall.co.uk.